Drywall looks simple on a set of drawings: flat walls, flat ceilings, a lot of the same material. That is exactly why it gets underestimated. A drywall bid that is off by a few hundred square feet, misses a fire-rated assembly, or prices a Level 5 finish as Level 4 can wipe out the profit on the whole package. For general contractors, drywall subcontractors and builders, knowing how to estimate drywall accurately is one of the fastest ways to tighten bids and protect margin.
This guide walks through how to estimate drywall step by step in 2026: how to measure walls and ceilings from blueprints, how to convert square footage into sheets, how much screws, tape and joint compound to carry, which waste factors make sense, and the details that most often get missed in a drywall takeoff. We will finish with a worked example and a checklist you can use on your next bid.
What Is a Drywall Takeoff?
A drywall takeoff is the measured list of every material needed to hang and finish the gypsum board on a project. It starts with the square footage of every wall and ceiling surface that receives board, then breaks that area down by board type, thickness and sheet size. From there the estimator adds the accessories and finishing materials: fasteners, joint tape, joint compound, corner bead, trims, and on many commercial jobs the metal stud framing, insulation and acoustical sealant that sit inside the same wall assembly.
Pricing comes after the takeoff. If the quantities are wrong, every unit price applied to them is wrong too. That is why a clean quantity takeoff is the foundation of every competitive drywall estimate.
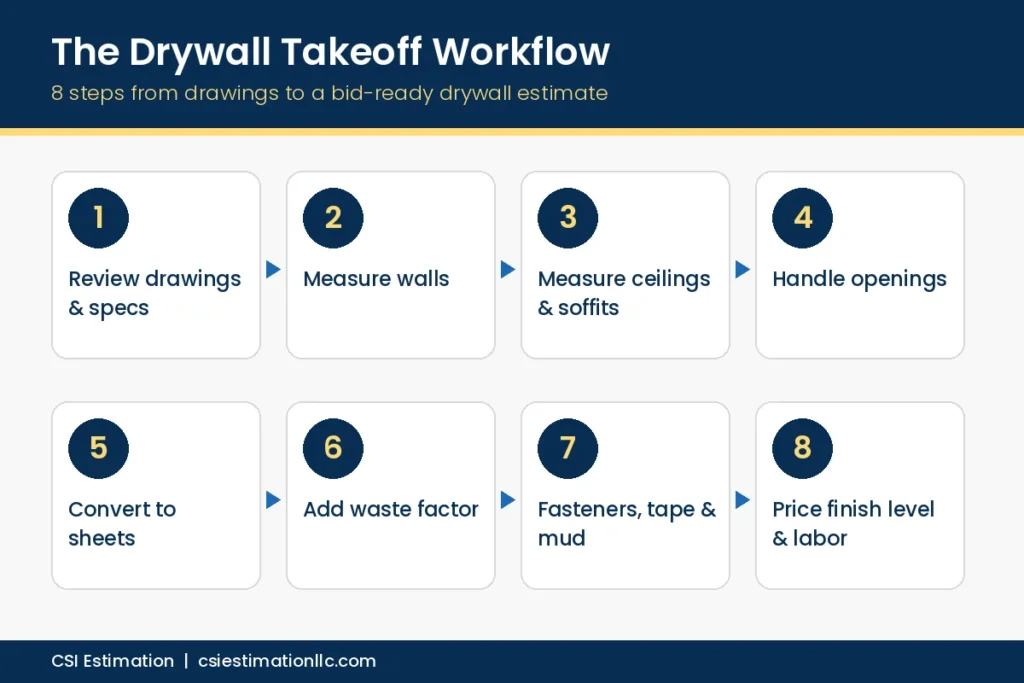
Step 1: Review the Drawings and Specifications First
Before you measure anything, read the documents that tell you what you are measuring. On residential work this may be a short set of plans and a few notes. On commercial work it usually means the architectural floor plans, reflected ceiling plans, wall type schedule, partition details, door and window schedules, finish schedule and the Division 09 specifications.
- Wall type schedule: shows each partition type, the number of layers of board on each side, the board type and thickness, stud size and spacing, and whether the wall carries a fire or sound rating.
- Reflected ceiling plan: shows which ceilings are gypsum board, which are acoustical tile, and where soffits, bulkheads and ceiling height changes occur.
- Finish schedule: tells you which rooms get moisture-resistant, mold-resistant, abuse-resistant or cement board, and where tile or wall coverings will be applied.
- Specifications: define the required level of finish, approved manufacturers, fastener spacing and any special requirements such as control joints.
Also check every addendum. A revised wall type that changes a single layer of 1/2-inch board to two layers of 5/8-inch Type X can nearly double the board on that partition.
Step 2: Measure Wall Square Footage
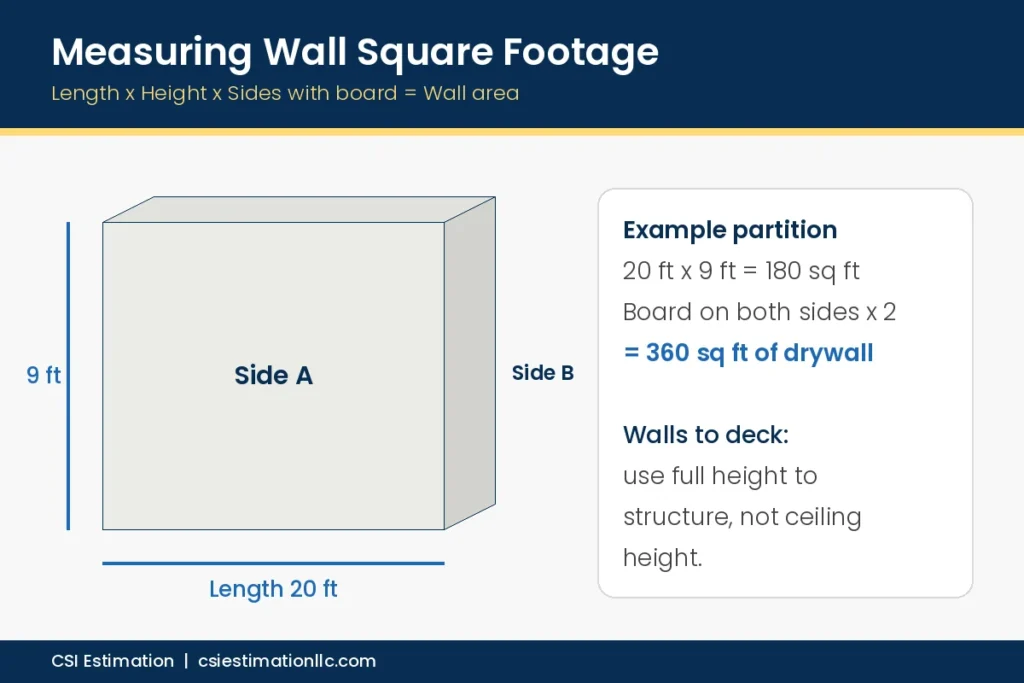
The basic formula is straightforward: wall length x wall height = wall area. Measure each wall type separately, and remember that a partition with board on both sides needs to be counted twice. A 20-foot interior partition that is 9 feet tall with one layer of board on each side carries 360 square feet of drywall, not 180.
Work methodically, room by room or wall type by wall type, and mark each run on the drawings as you go so nothing is counted twice or skipped. For walls that run above the ceiling to the deck for fire or sound separation, use the full height to structure, not the finished ceiling height. This single detail is one of the most common sources of shortfall on commercial drywall bids.
Step 3: Measure Ceilings, Soffits and Bulkheads
Ceiling area is length x width for each room that receives a gypsum board ceiling. Take soffits and bulkheads separately: measure both the bottom face and the vertical sides, and note that these areas need more labor, more corner bead and more finishing than an open flat ceiling. Sloped or vaulted ceilings should be measured along the slope, not on the flat plan dimension, or you will understate the board.
Step 4: Decide How to Handle Openings
Estimators handle doors and windows in different ways, and it matters. Board is usually hung across small openings and cut out afterward, so the cut-out piece often becomes waste rather than savings. For that reason, many estimators do not deduct small openings such as standard doors and windows, and only deduct large openings such as storefronts, overhead doors, wide cased openings and curtain wall. Whatever method you use, apply it consistently across the whole job, and remember that every opening still needs corner bead or trim and extra finishing.
Step 5: Convert Square Footage Into Sheets
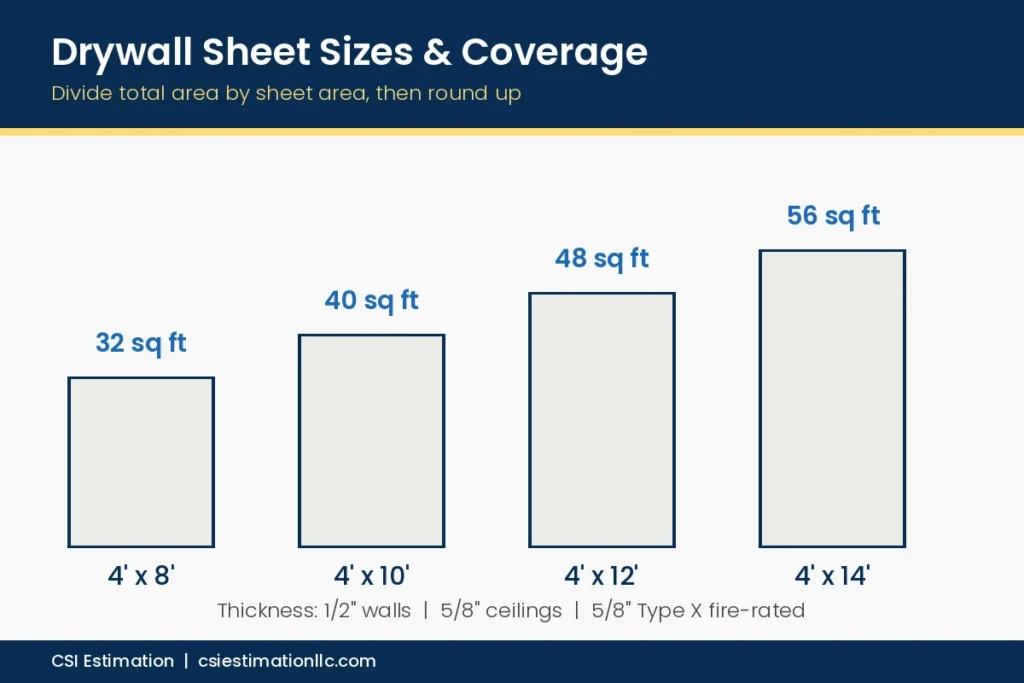
Once you have the total area for each board type, divide by the area of the sheet you plan to use, then round up. Common sheet sizes and their areas are:
- 4 ft x 8 ft = 32 sq ft
- 4 ft x 10 ft = 40 sq ft
- 4 ft x 12 ft = 48 sq ft
- 4 ft x 14 ft = 56 sq ft
Longer sheets mean fewer butt joints and less finishing time, which is why 12-foot board is common on walls and ceilings where it can be handled and delivered. Common thicknesses are 1/2 inch for most residential walls and ceilings, 5/8 inch for ceilings with wider framing spacing, and 5/8-inch Type X where fire-rated assemblies are required. Keep each board type as its own line item so that pricing, ordering and delivery are clear.
Step 6: Add the Right Waste Factor
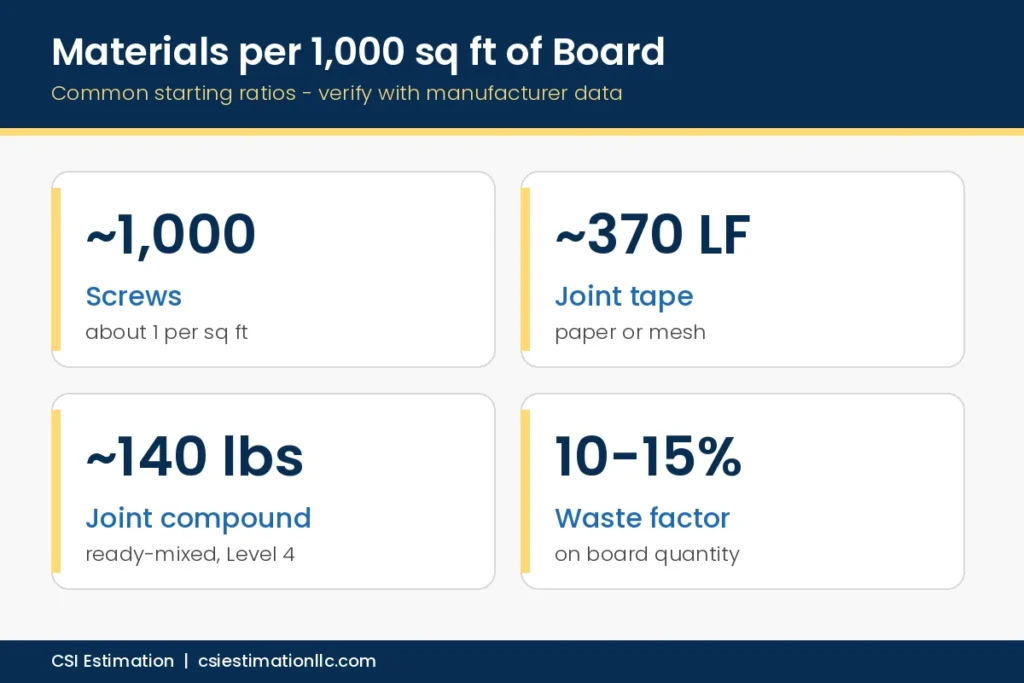
Drywall waste comes from cut-outs, offcuts that are too small to use, breakage and damage on site. A waste factor of around 10 percent is common for straightforward layouts with long, simple walls. Projects with many small rooms, angles, soffits, curved walls or frequent ceiling height changes often need 12 to 15 percent or more. Apply waste to the board quantity, then round to full sheets and, where it matters for ordering, to full bundles.
Step 7: Calculate Fasteners, Tape and Joint Compound
Finishing materials are usually estimated as a ratio of the total board area. Industry rules of thumb that many estimators start from include:
- Screws: roughly one screw per square foot of board, adjusted for the fastener spacing in the specifications and for multi-layer assemblies.
- Joint tape: commonly cited at around 370 linear feet per 1,000 square feet of board.
- Joint compound: commonly cited at around 140 pounds of ready-mixed compound per 1,000 square feet for a standard finish, with more needed for higher finish levels and skim coats.
- Corner bead and trim: measured as the linear feet of every outside corner, exposed edge, opening and soffit edge, plus control joints where the specifications call for them.
Treat these as starting points, then check them against the manufacturer’s coverage data and your own crews’ historical usage. Your production records are always more accurate than a generic ratio.
Step 8: Price the Finish Level and Labor
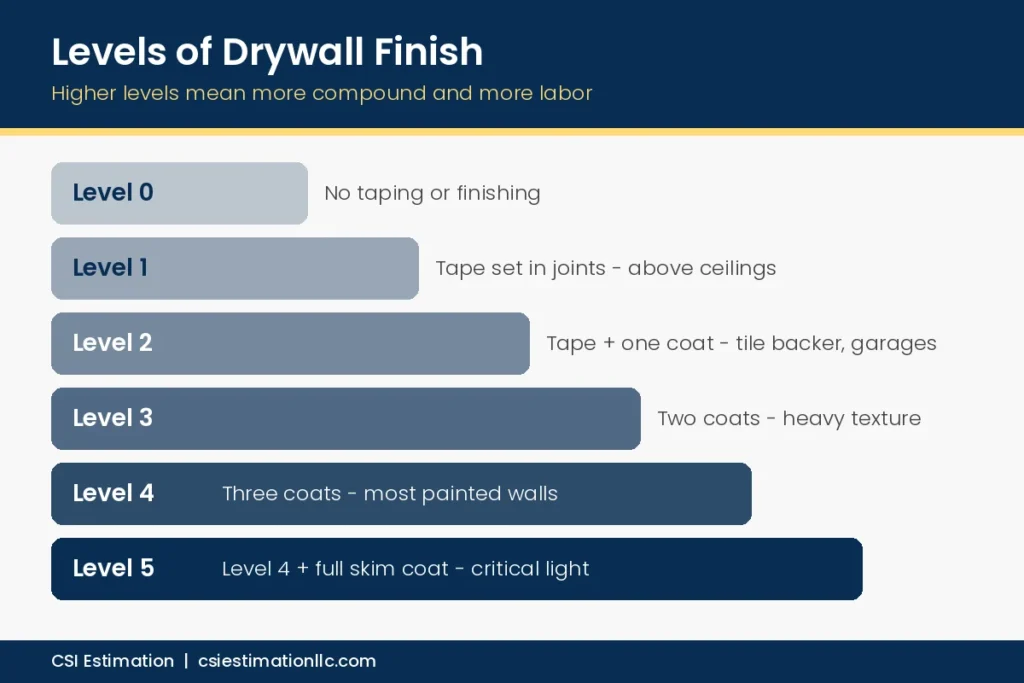
Labor is usually the largest part of a drywall estimate, and the required level of finish has a big effect on it. Levels of gypsum board finish run from Level 0, with no taping at all, to Level 5, which adds a skim coat over the entire surface for areas with critical lighting or glossy paint. Most painted walls are specified at Level 4, while areas above ceilings or in utility spaces may only need Level 1 or Level 2. Pricing every surface at the same level is a quick way to either lose the bid or lose money on it.
Labor productivity also changes with ceiling height, lift and scaffold needs, multi-layer assemblies, rated walls with special sealant requirements, and site access. Price hanging and finishing as separate activities with their own production rates, and always use current local labor and material pricing rather than old numbers carried forward from a previous bid.
Worked Example: Estimating Drywall for One Room
Here is a simple example for a 12 ft x 14 ft room with an 8 ft ceiling, one standard door and one window, using 1/2-inch board on 4 x 12 sheets:
- Walls: perimeter of 52 ft x 8 ft height = 416 sq ft
- Ceiling: 12 ft x 14 ft = 168 sq ft
- Total board area: 584 sq ft (small openings not deducted)
- Add 10% waste: about 642 sq ft
- Sheets: 642 / 48 = 13.4, rounded up to 14 sheets of 4 x 12
- Screws: about 600
- Joint tape: about 216 linear ft
- Joint compound: about 82 lbs of ready-mixed compound
On a real project, you repeat this process for every room and every wall type, keep rated and moisture-resistant board separate, and then add corner bead, trims, framing and labor to complete the estimate.
Common Drywall Estimating Mistakes to Avoid
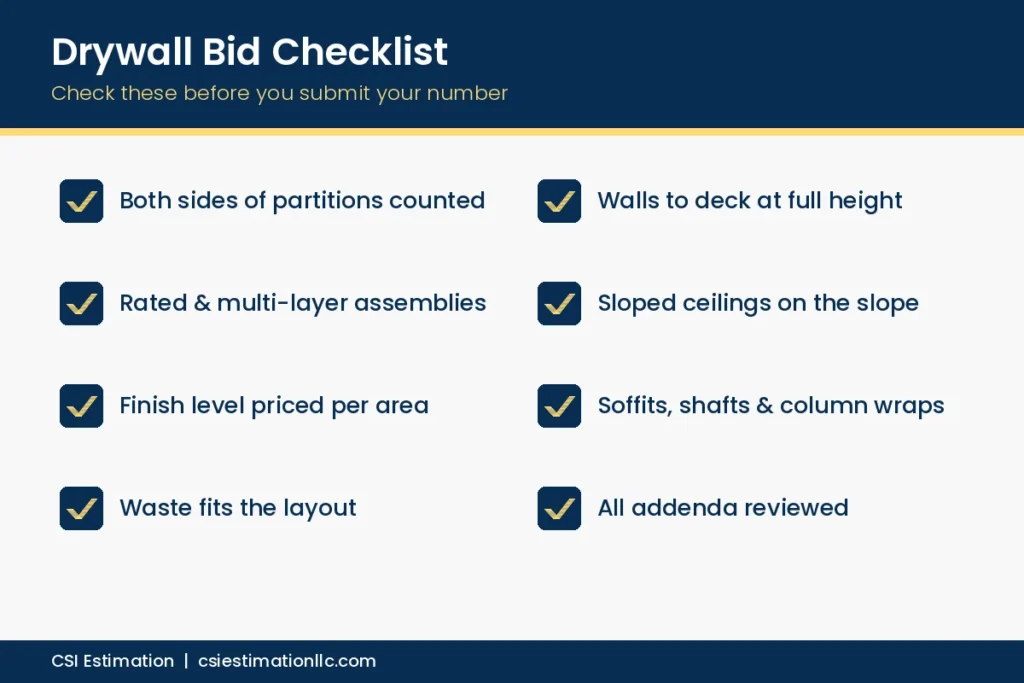
- Counting only one side of interior partitions.
- Using finished ceiling height for walls that extend to the structure above.
- Missing multi-layer or fire-rated assemblies hidden in the wall type schedule.
- Measuring sloped ceilings on the flat plan dimension.
- Pricing every surface at the same level of finish.
- Forgetting soffits, bulkheads, shaft walls and column wraps.
- Applying too little waste on cut-up layouts.
- Skipping addenda that change wall types or ceiling heights.
For a broader look at where estimates go wrong, see our guide to common construction estimating mistakes.
Manual Takeoff vs. Software vs. Outsourcing
Small residential jobs can be estimated by hand with a scale ruler and a spreadsheet. As projects grow, on-screen takeoff software speeds up measuring and makes it easier to track wall types and revisions. But software is only as good as the person using it, and many contractors simply do not have the estimating hours to keep up with every bid invitation.
That is where a professional estimating partner helps. CSI Estimation provides detailed drywall takeoffs as part of our finishes estimating services and material takeoff services, for both residential and commercial projects. You get quantities broken down by wall type, board type and finish level, ready to price with your own rates, so your team can spend its time winning work instead of measuring it.
Frequently Asked Questions
How do you estimate how much drywall you need?
Measure the area of every wall and ceiling that receives board, counting both sides of interior partitions. Add a waste factor of about 10 to 15 percent, then divide by the area of your sheet size, such as 48 sq ft for a 4 x 12 sheet, and round up to full sheets.
What waste factor should I use for drywall?
Around 10 percent is common for simple layouts. Use 12 to 15 percent or more for jobs with many small rooms, angles, soffits or curved walls.
Should I deduct doors and windows from a drywall takeoff?
Many estimators do not deduct small openings because board is hung across them and the cut-outs become waste. Large openings such as storefronts and overhead doors are usually deducted. Be consistent across the whole project.
How much joint compound do I need per 1,000 square feet?
A commonly used starting point is around 140 pounds of ready-mixed compound per 1,000 square feet for a standard finish. Higher levels of finish need more, so always check manufacturer coverage and your own crew history.
Can I outsource just the drywall takeoff?
Yes. Many contractors outsource a single trade like drywall while keeping the rest of the estimate in-house. You receive verified quantities for that scope and apply your own pricing.
Related Guides
- Construction Estimating Services in California
- Do Construction Takeoff Services Help To Reduce The Cost Of The Project?
- How to do a Takeoff With Viewpoint Mep Estimating
Need numbers you can bid with? See our Finishes Estimating Services.
Conclusion: Bid Drywall With Confidence
Accurate drywall estimating comes down to reading the wall types carefully, measuring every surface the right way, converting area into the right sheets, carrying realistic waste and finishing materials, and pricing labor by finish level. Get those steps right and your drywall bids will be competitive without hidden scope gaps.
Need a drywall takeoff fast? Send us your drawings and get detailed, verified quantities back in as little as 24 to 48 hours.